Baby sign language can be a fun and effective way to communicate with babies before they learn to speak verbally. When should you start and which signs should you teach first? Let’s review the fundamentals of baby sign language, then learn eleven signs that you can use to introduce baby sign language to your family.
Baby sign language basics
Our recent article, Baby Sign Language: What It Is, What the Benefits Are, & When to Start, provides a great overview of all things baby sign language. As its title suggests, it includes detailed information about the what, why, and how of using baby sign language, including:
• Baby sign language is based on American Sign Language, but modified to be easier for little hands.
• Baby sign language can ease frustration and lead to fewer meltdowns by giving babies a way to communicate their wants and needs.
• Baby sign language can boost language development throughout early childhood, including helping toddlers put signs and words together and bridging the gap between words in bilingual households.
• You can begin signing to your baby at any time, but most babies begin to sign back around 6-9 months, when they are able to make intentional gestures and controlled hand movements.
• To succeed with baby sign language, use it when baby is alert and happy, repeat the signs along with the spoken word as often as possible, and give baby plenty of positive feedback.
How to teach baby sign language to your child
With those foundations in place, you’re ready to start teaching baby sign language to your baby! Teaching your baby a sign involves three steps: model, pause, and respond.
1. Model.
Show the sign to your baby as often as you can. Pair the verbal word with the sign to help baby learn from your words and actions.
2. Pause.
Give your baby 5-10 seconds to process the word and sign. This provides the time that little ones need to think and respond successfully.
3. Respond.
Any time your baby tries to communicate using gestures or words, respond with positive feedback and give them what they requested. This helps baby understand that using a gesture communicates what they want, and increases the likelihood that baby will respond in the future.
Baby’s first signs: Which signs should you teach first?
To get started with baby sign language, begin with signs that are easy for baby to make and relevant to their world. Many babies can make “C” and “O” shapes with their hands by 9-10 months, so signs that incorporate those shapes are a great place to start.
Introduce these signs to 9-12 month old babies:
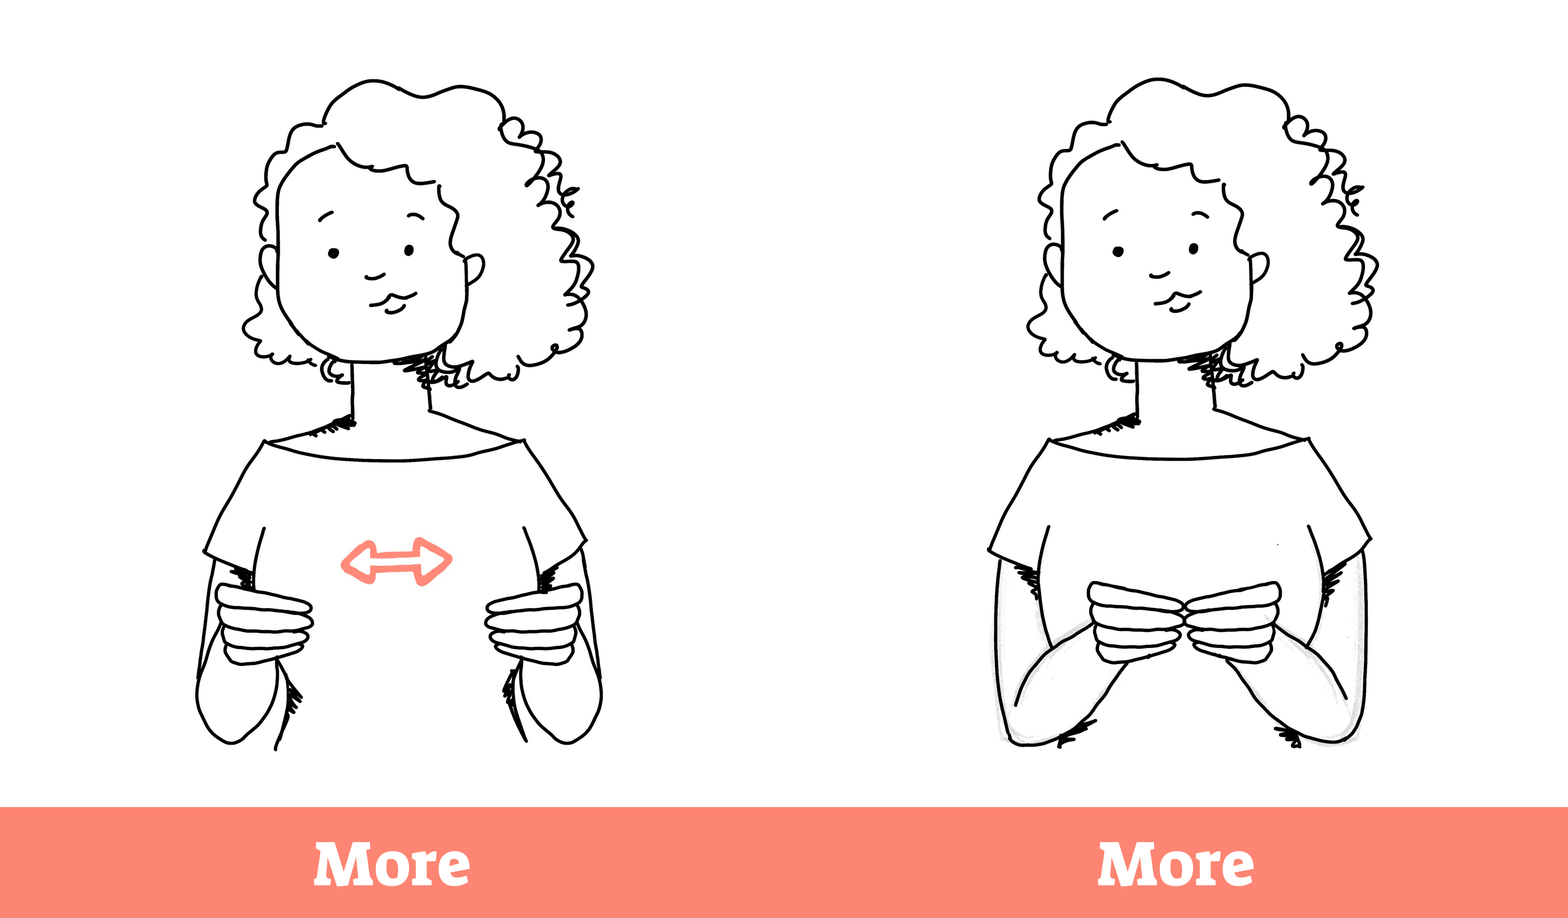
• More: More is signed by tapping your finger tips together. This is a very versatile sign useful in many contexts, and is often the first sign learned.
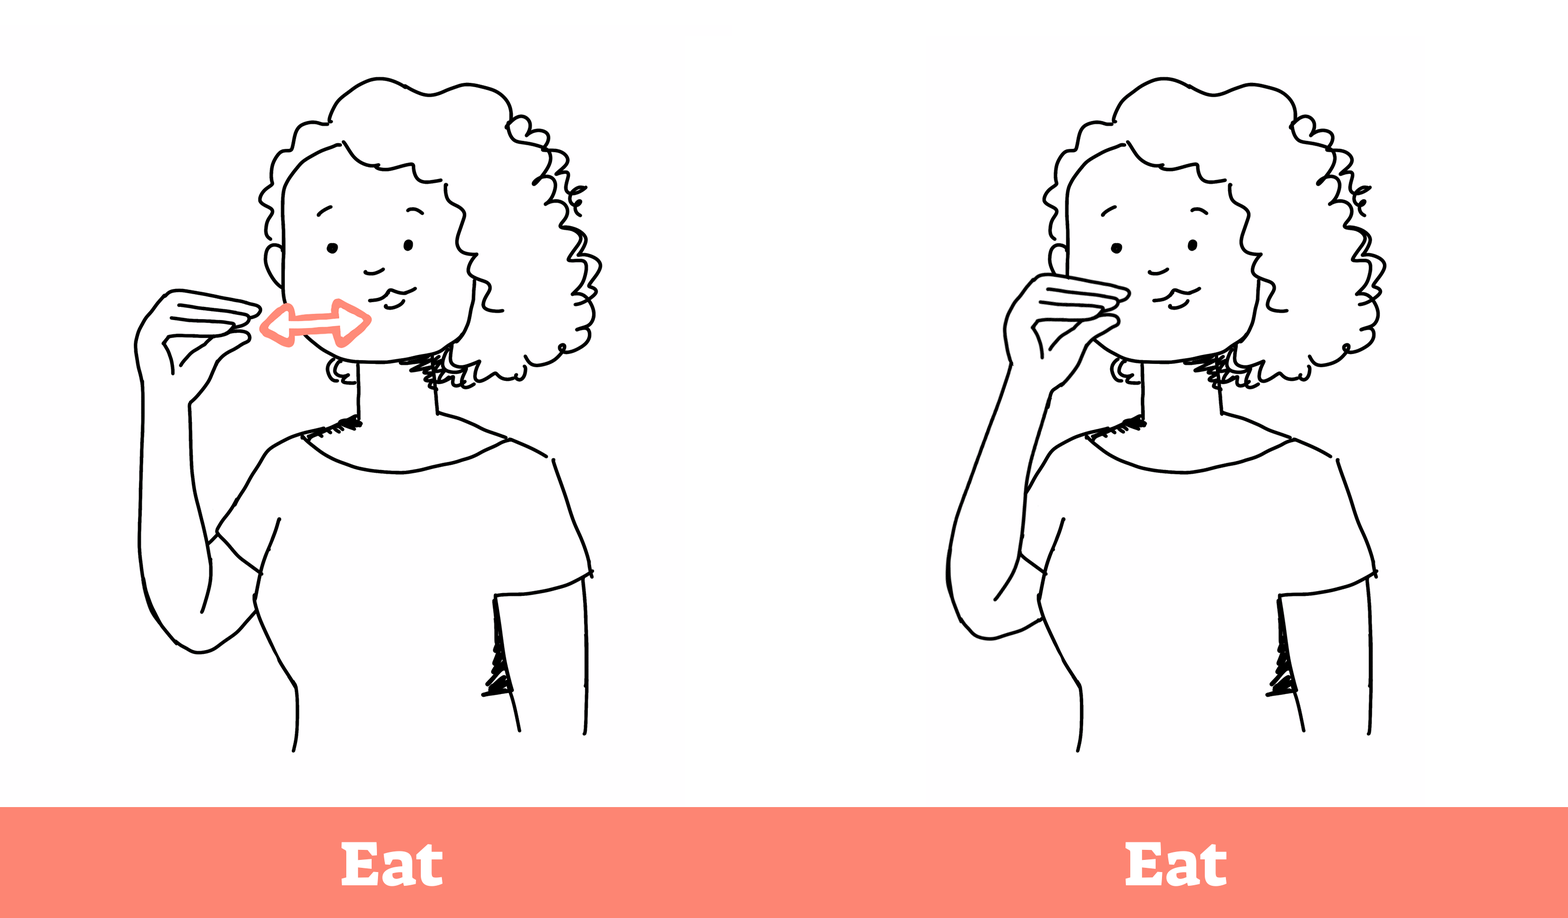
• Eat: Eat looks like you are putting food to your mouth, with your thumb to your fingers. Eat is particularly useful for babies eating solids.
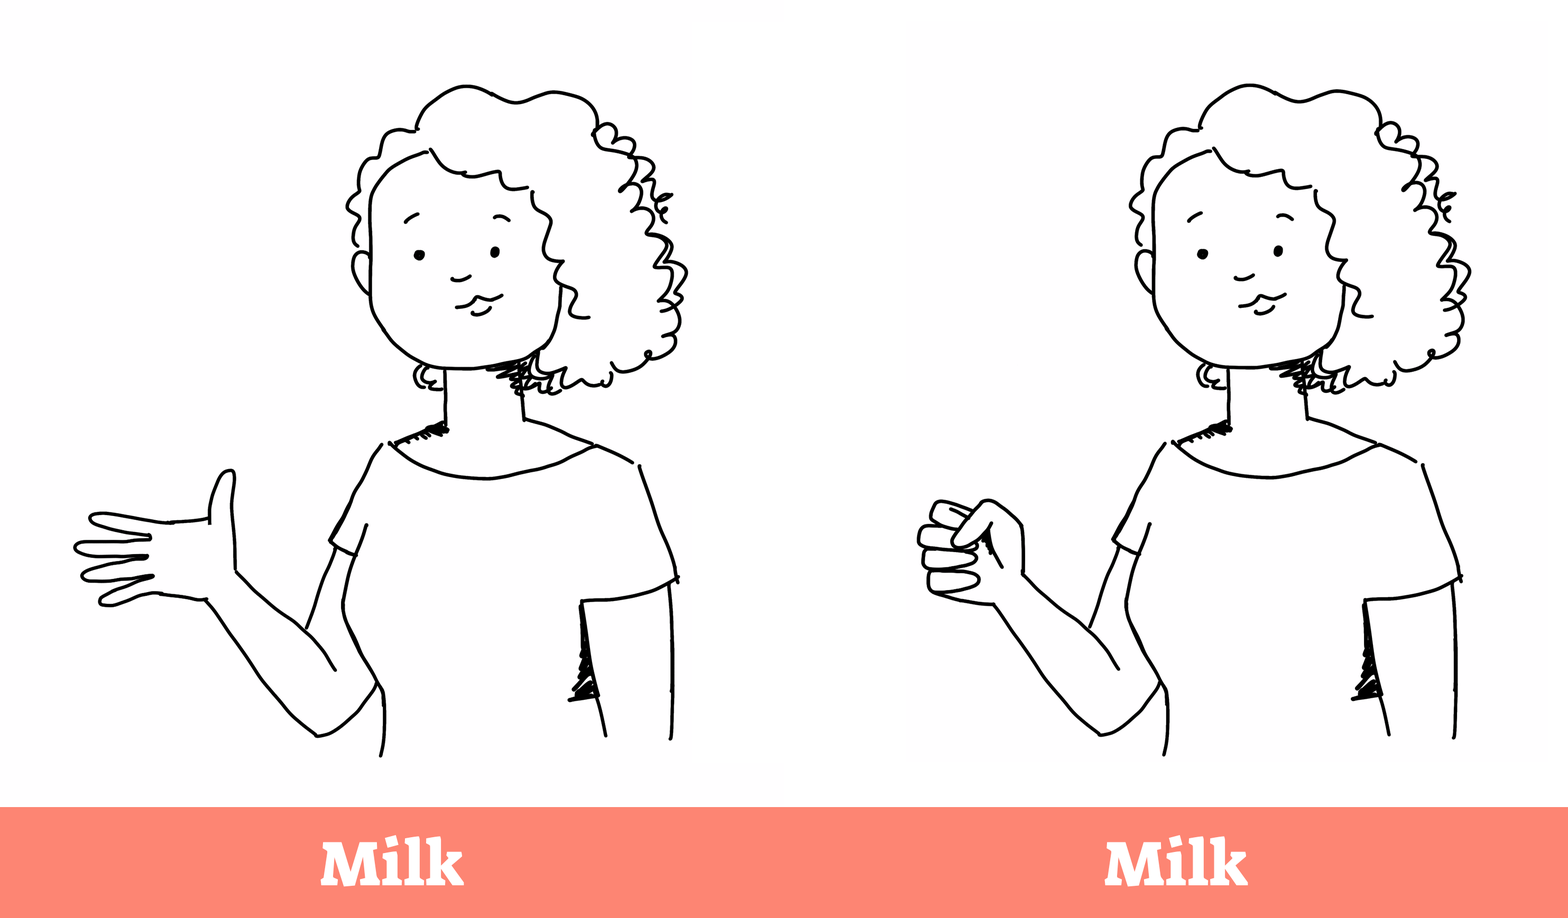
• Milk: Milk is signed by opening and closing your hand, like you are milking a cow. This is a very useful sign for babies who are breastfeeding or on formula.
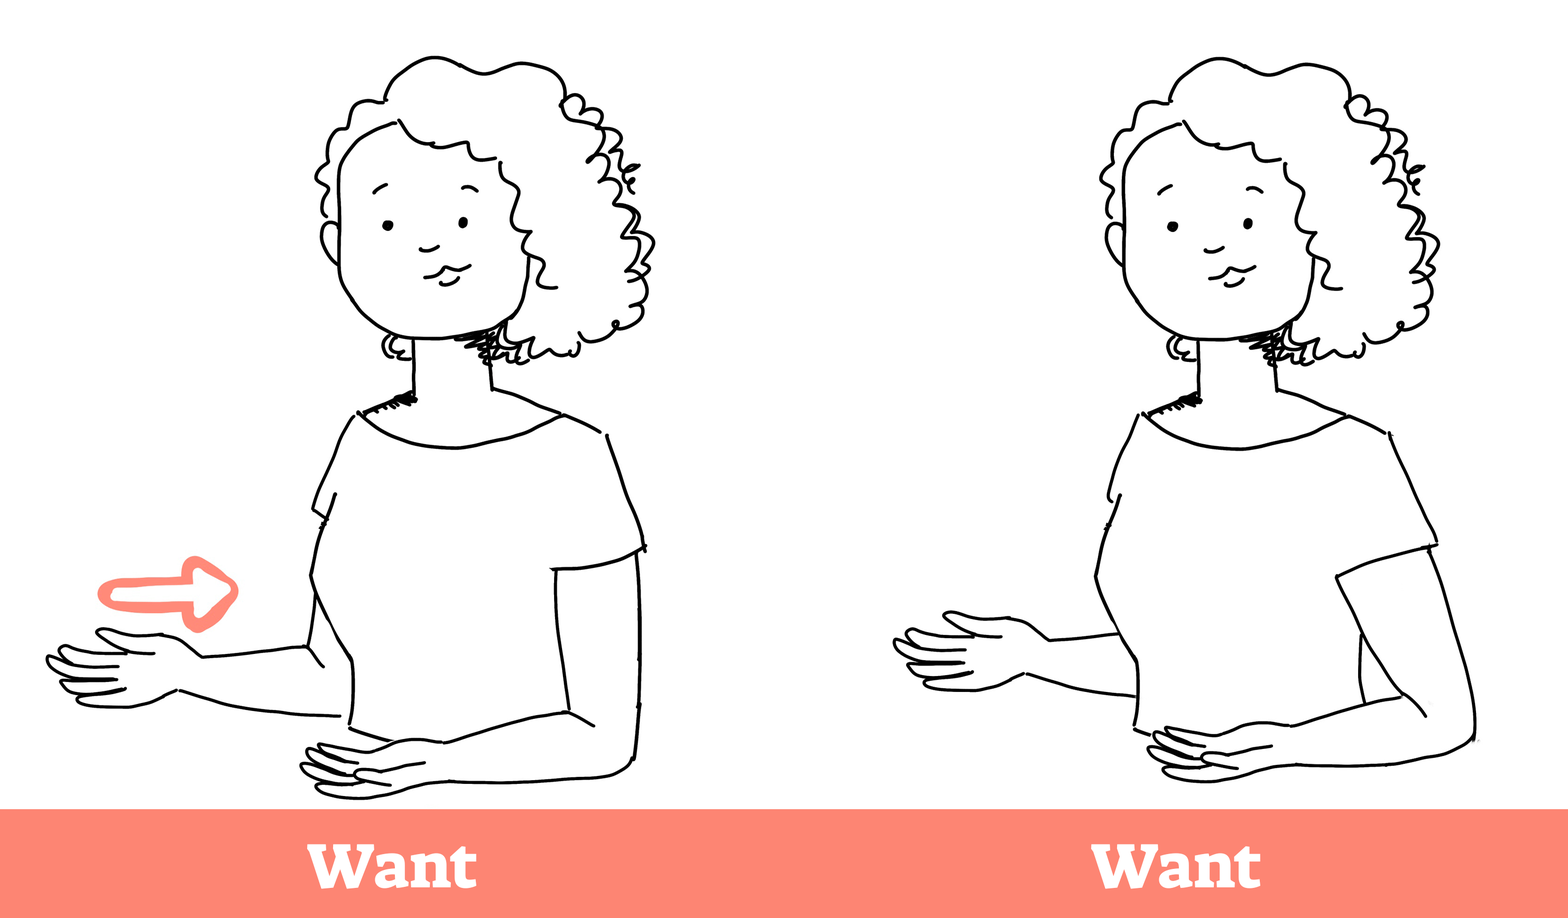
• Want: The want sign looks like you are pulling something toward you. Place your hands out, with palms facing up, making your hands into a claw shape. Then pull both your hands toward you.
By 12-18 months, many babies can add these signs to their vocabulary:
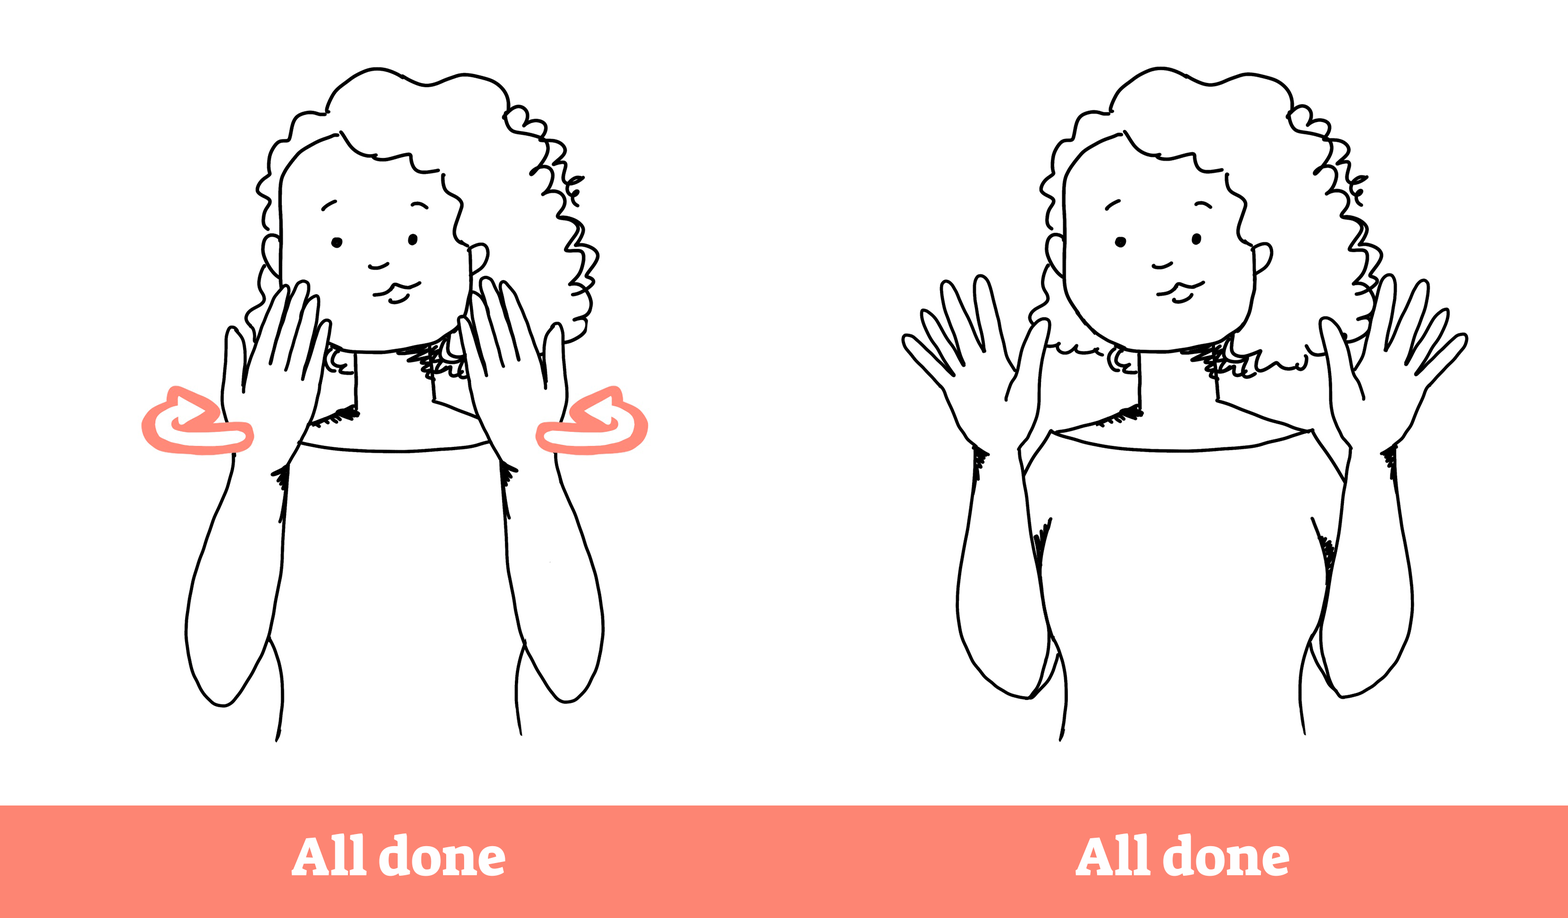
• All done: All done is signed by twisting your hands back and forth. It allows baby to tell you they are finished eating (without flinging food).
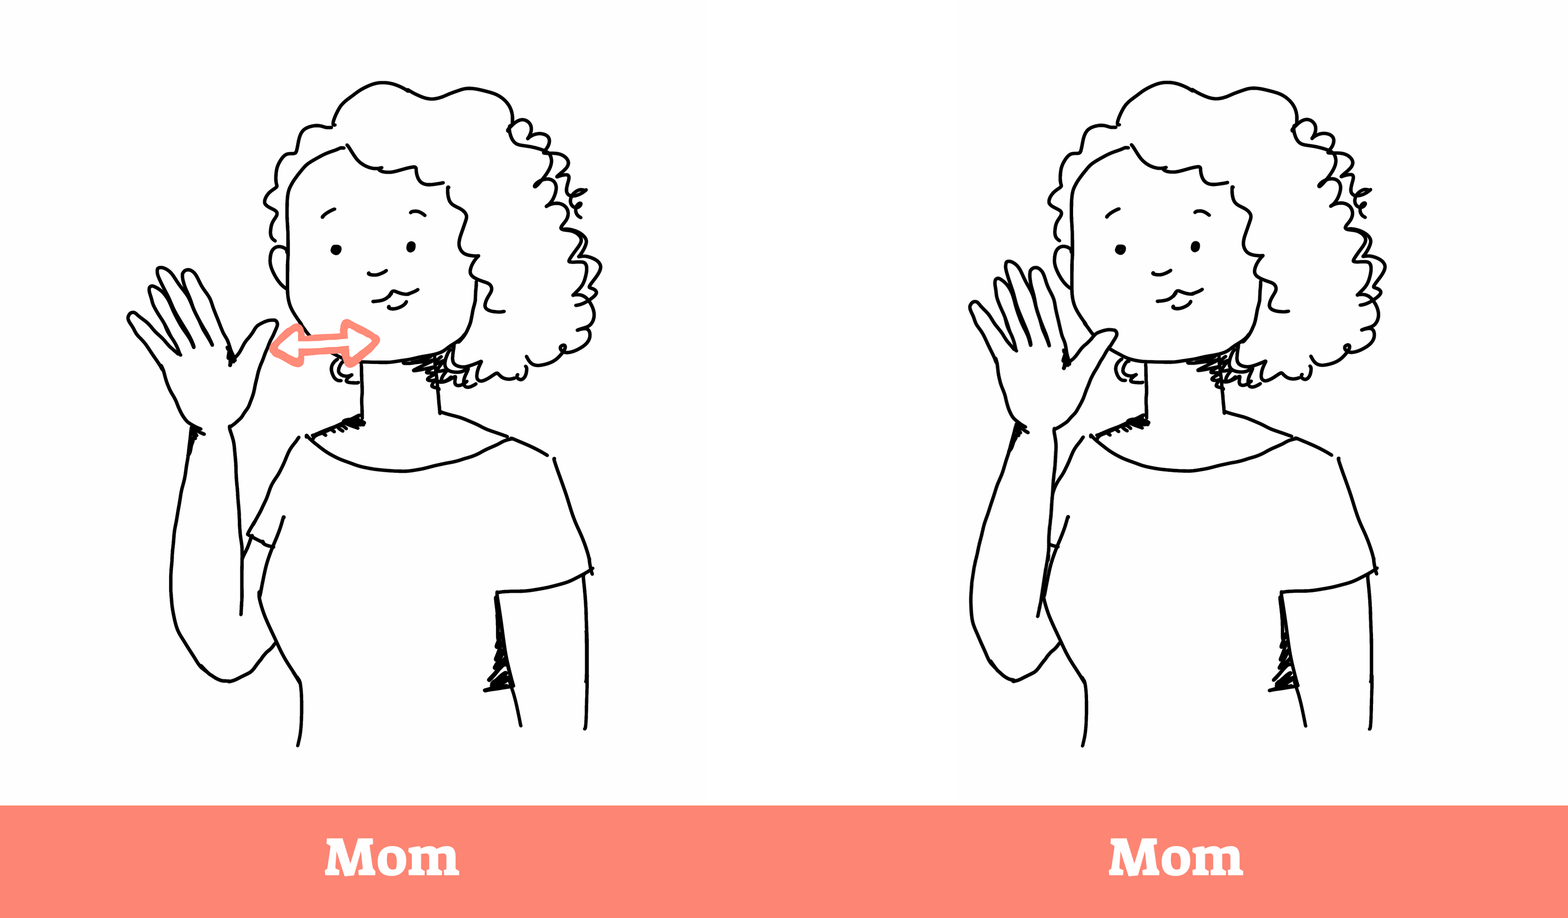
• Mom: Mom is signed by tapping your thumb on your chin. In ASL female signs are usually below the nose, and male signs above the nose.
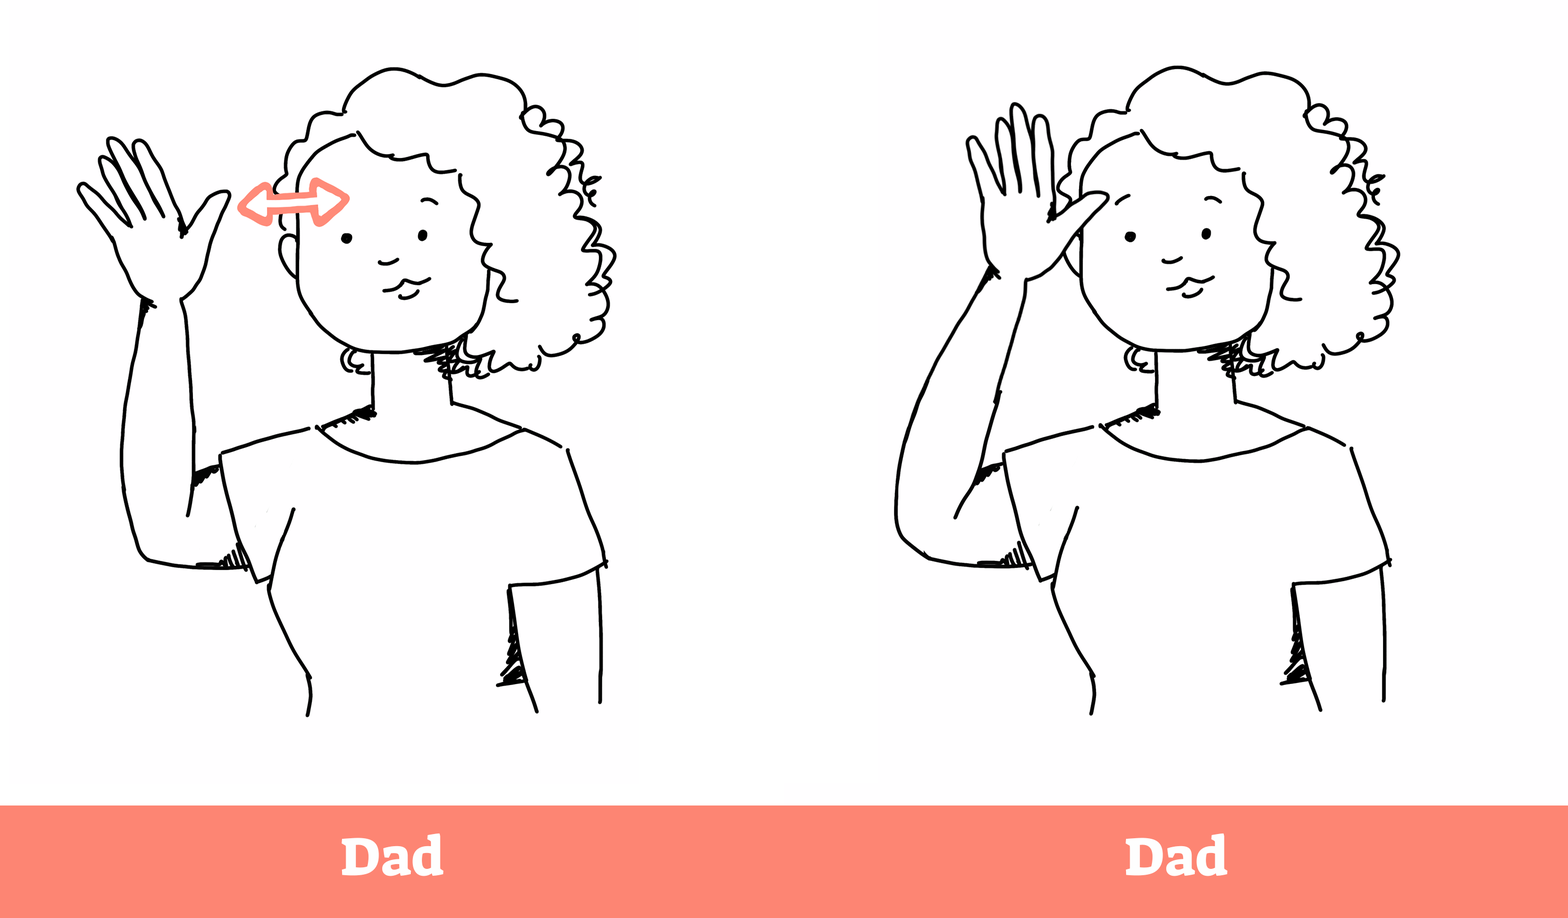
• Dad: Dad is signed by tapping your thumb on your forehead. The signs for mom and dad are similar, however, the mom sign is performed on the chin and the dad sign is performed higher up on the forehead.
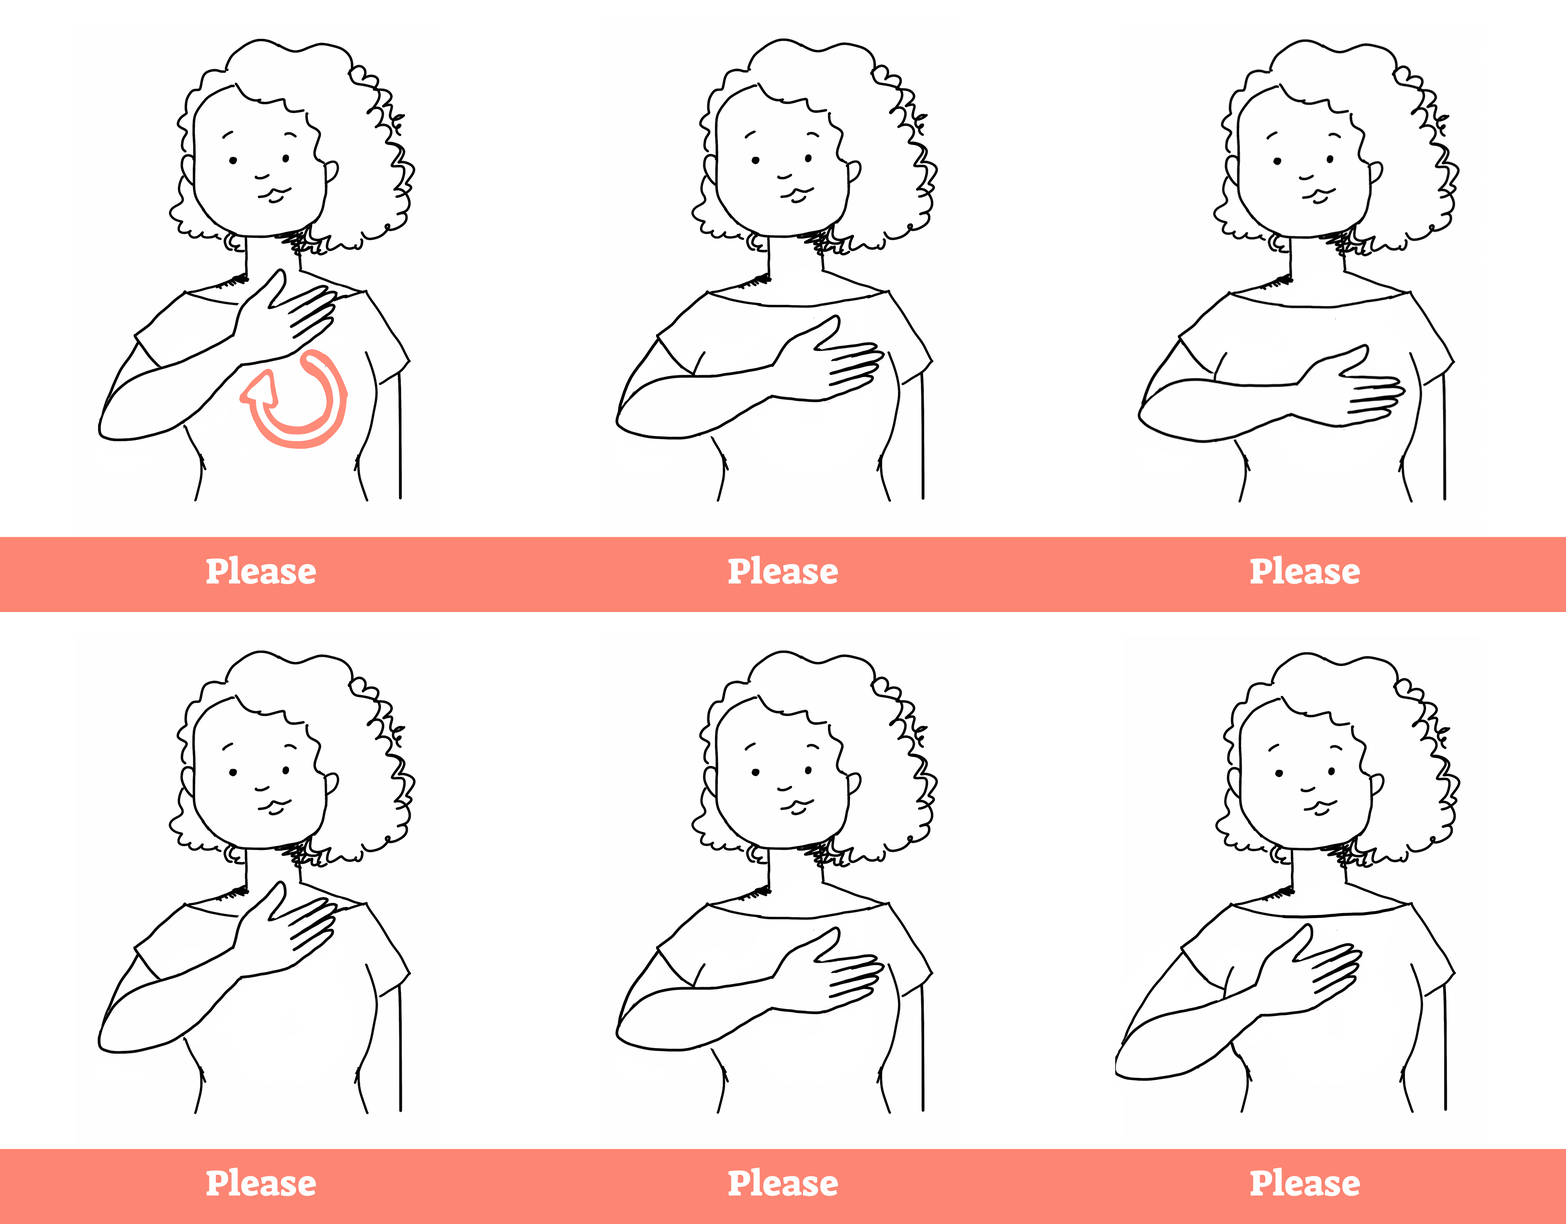
• Please: To sign please, take your dominant hand with fingers extended and held together, and thumb extended and sticking out. Take the hand with palm facing in and rub it in a circle on your chest.
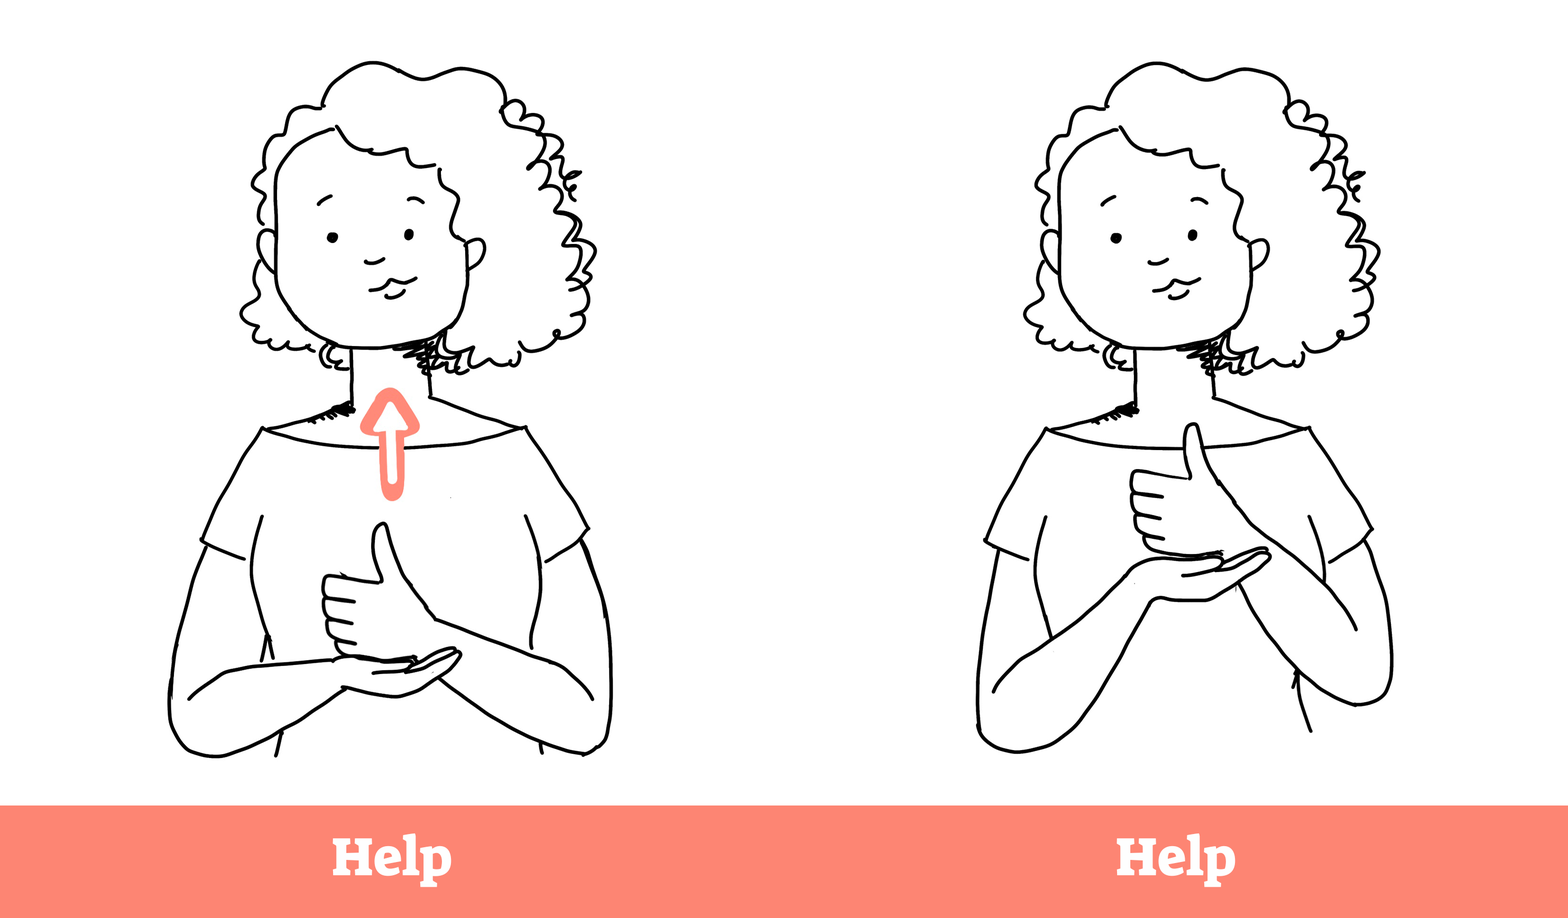
• Help: To sign help, place your closed-fist, dominant hand on top of your non-dominant open palm, and move both hands upwards.
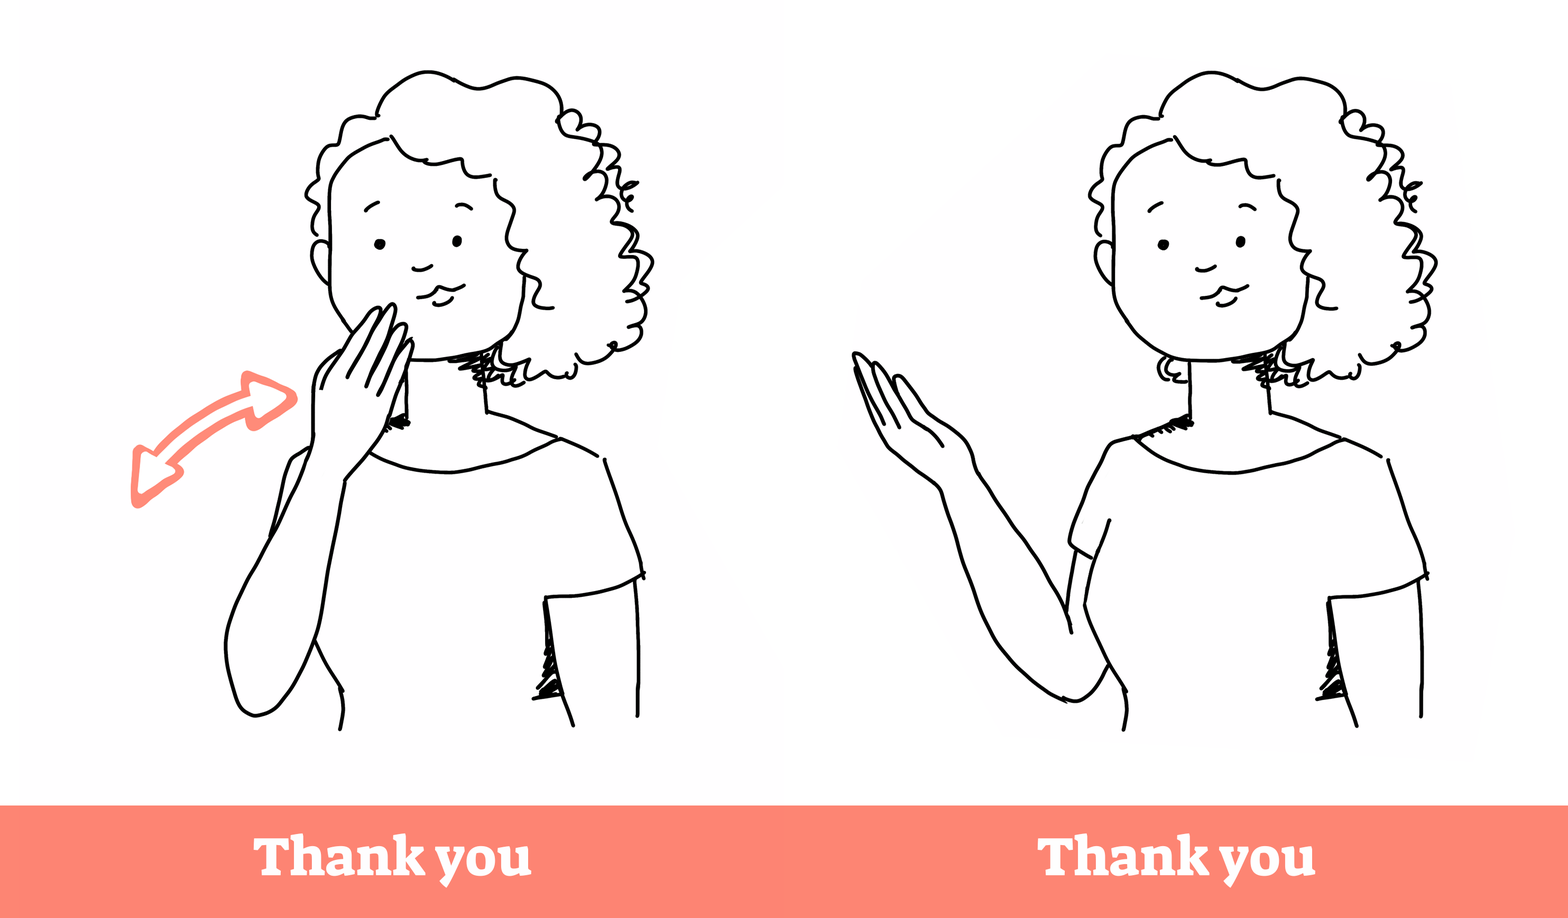
• Thank you: To sign thank you, extend your fingers and thumb. Touch your fingers to your chin and bring your fingers forward. It is almost like you are blowing a kiss out, to thank the person, but the sign is a bit lower.
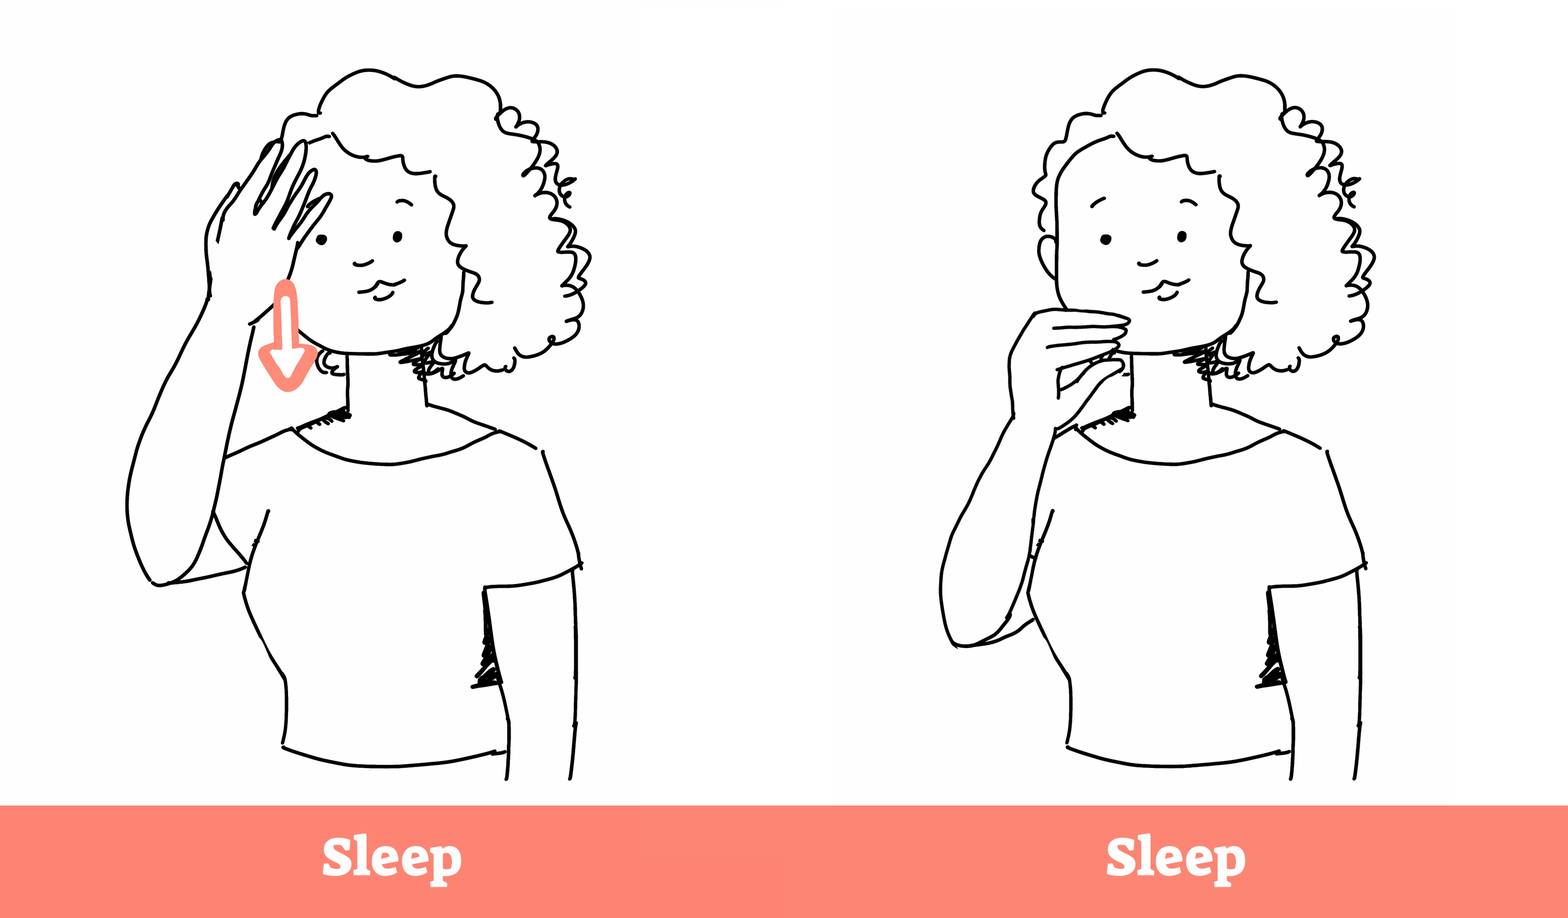
• Sleep: To sign sleep, start with your dominant fingers extended and spread apart. Beginning with your hand over your face, move your fingers down to end with your hand below your chin and your fingers touching your thumb. As you make the sign, feel your face relax and your eyes get droopy to add to the sleepy effect.
For real demonstrations of these signs as well as tips on advancing baby sign language, baby sign songs, how to incorporate siblings and caregivers and more, check out our Baby Sign Language for Infants and Toddlers course. Good luck and happy signing!

About our Expert
Stephanie Tuthill is an ASHA-certified Speech-Language Pathologist with a background in special education and deaf education. As a mom of three, she understands the importance of early development and is dedicated to supporting baby's communication skills. Stephanie has more than ten years of experience in pediatric therapy and degrees from Vanderbilt University and Northwestern University.
All written descriptions courtesy of babysignlanguage.com.


